How to Create Critical CSS in WordPress
March 14, 2019 By Hiep Dinh
Because page speed and SEO are so intertwined, there are several SEO benefits that come with fast site performance. There are also a few speed-enhancing plugins to consider that can help improve site speed in WordPress. However, one of the biggest obstacles to a speedy page load is render-blocking CSS and JavaScript.
When coding WordPress themes, it’s a best practice to avoid render blocking CSS and JavaScript if you want a speedy site. There are two methods to address render blocking CSS – manually authoring the Critical CSS or using automated tools to generate those styles when it might be easier to do so. Here’s how to create critical CSS in WordPress using these two methods:
Some Tips to Keep in Mind
Whether you manually author or automatically generate your Critical CSS, be sure to:
1. Avoid “Blocking” Style Rules in the CSS
Avoid “blocking” style rules in the CSS. The basic idea is that an external request in your Critical styles, like a ‘background: url({path to file});” will stop the page rendering because the browser has to download the resource before continuing with the rest of the page, defeating the purpose of inline Critical CSS.
2. Make Sure Critical CSS is Sized to Fit Within First Server Response
Make your Critical CSS about 10k in size to factor in the overall size of those styles plus the size of the html, aiming to fit both within the 14k first response from the server.
How to Create Critical CSS in WordPress
Method #1 – Manually Authoring Critical CSS for New Site Builds
1. Set up a Gulp Task for Compiling
When starting a theme from scratch, we like to manually author our Critical CSS by setting up a Gulp task to compile our “Critical” SCSS styles, which will end up in a <style> tag in the header via PHP includes.
The Gulp task is set to process the “/scss/inline/” folder and compile the scss within:
var sass = require('gulp-sass'); // Gulp pluign for Sass compilation.
var notify = require('gulp-notify'); // Sends message notification to you

// Browsers you care about for autoprefixing.
// Browserlist https://github.com/ai/browserslist
const AUTOPREFIXER_BROWSERS = [
  'last 2 version',
  '> 1%',
  'ie >= 10',
];
gulp.task('styles', function () {
  gulp.src( styleSRC )
  .pipe( sass( {
    errLogToConsole: true,
    outputStyle: 'compressed',
    precision: 10
  } ) )

  .on('error', console.error.bind(console))

  .pipe( gulp.dest( 'scss/' ) )

  .pipe( notify( { message: 'TASK: "styles" Completed! ????', onLast: true } ) )
});
The resulting files:
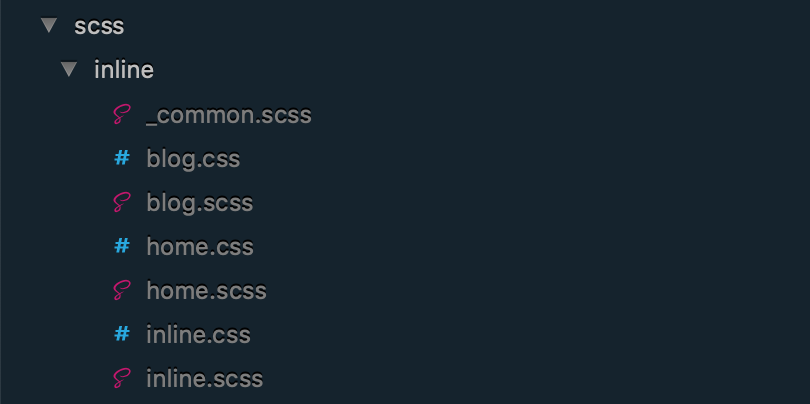
Here’s what the code in home.scss looks like:
//Setup colors, variables, and mixins
@import "../partials/variables-mixins";
//col-x-x grid stuff
@import "../partials/grid";

// stuff that's common to all inlined css
@import "common";


body { background: red; }
2. Import Styles from “_common.scss”
Notice on line 7 we import styles from “_common.scss”, which is a partial containing the critical styles common to all the pages (such as header, nav, etc). After the import, we’ll write CSS that’s specific to the page we’re working on (i.e.: the home page in this example) starting on line 10.
3. Add Conditional for Specific Output to header.php
Our header.php has a conditional to output specific Critical CSS for specific pages:
<style>

  <?php

    if( is_front_page() ) :

      include("scss/inline/home.css");

    elseif( is_home() ) :

      include("scss/inline/blog.css");

    else :

      include("scss/inline/inline.css");

    endif
  ?>

</style>
Method #2 – Automating the Critical CSS Process for Existing Sites
Determining the Critical CSS for an existing, un-optimized site, and then manually coding those styles could take a lot of work and time. In order to save time and increase efficiency for yourself, and also your client, consider using automated tools to make the process easier. Luckily, Gulp can help with this through a tool called Penthouse.
1. Pair Gulp with Penthouse
Our Gulp task will scan a list of URLs that we define and then extract the Critical CSS from those pages automatically.
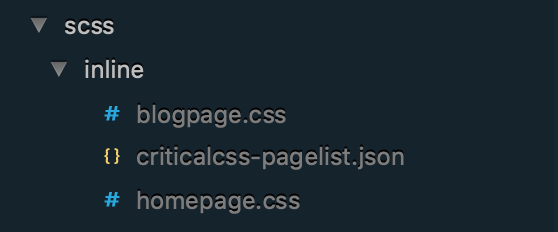
2. Create an Extra “criticalcss-pagelist.json” File
To start off, we’ll have to create an extra “criticalcss-pagelist.json” file to store the URLs of the pages we want to scan, then the resulting Critical CSS files are stored in the “scss/inline/” folder:
Contents of our “criticalcss-pagelist.json” file:
{
  "urls": [
    {
      "link": "http://localhost/base/",
      "name": "homepage"
    },
    {
      "link": "http://localhost/base/blog/",
      "name": "blogpage"
    }
  ]
}
The Gulp task:
// auto generate critical css
var penthouse    = require("penthouse");
var fs           = require('fs');
var urlList      = require('./scss/inline/criticalcss-pagelist.json');
// gulp criticalcss
// Auto generates CriticalCSS for above-the-fold content
gulp.task('criticalcss',function(){

  // look to scss/inline/criticalcss-pagelist.json for list of input pages and output files
  urlList.urls.forEach(function(item,i){
    penthouse({
      url: item.link,  // can also use file:/// protocol for local files
      css: 'scss/base.css',  // path to original css file on disk
      width: 1680,  // viewport width for 13" Retina Macbook.  Adjust for your needs
      height: 953,  // viewport height for 13" Retina Macbook.  Adjust for your needs
      keepLargerMediaQueries: true,  // when true, will not filter out larger media queries
      propertiesToRemove: [
        '@font-face',
        /url\(/
      ],
      userAgent: 'Penthouse Critical Path CSS Generator', // specify which user agent string when loading the page
      puppeteer: {
        getBrowser: undefined, // A function that resolves with a puppeteer browser to use instead of launching a new browser session
      }
    })
    .then(criticalCss => {
      // use the critical css
      fs.writeFileSync('scss/inline/'+item.name+'.css', criticalCss);
    })
    .catch(err => {
        // handle the error
    })
  })
});
3. Add the Conditional for Specific Output in header.php
And our conditional in header.php is very similar:
<?php

  if( is_front_page() ) :

    include("scss/inline/homepage.css");

  elseif( is_home() ) :

    include("scss/inline/blogpage.css");

  else :

    include("scss/inline/inline.css");

  endif
?>
4. Run Penthouse and Check for Broken Styles
After you run Penthouse, be sure to check for broken styles. Penthouse will sometimes skip over classes that are added via JavaScript. However, there is an option to “forceInclude” any selectors that Penthouse may have missed. You can also just paste in any missing styles into your Critical CSS manually if it’s easier.
Final Step – Add the Styles to the Rest of Your Pages in the Footer
The final step, whether you manually or automatically generate your Critical CSS, is to add the styles for the rest of your pages to footer.php using a technique described in this article:
<!-- Link to stylesheet -->
<link rel="stylesheet" href="<?php echo get_template_directory_uri() . '/scss/base.css'; ?>" media="print" onload="this.media='all'; this.onload=null;">

<!-- Fallback -->
<noscript>
<link rel="stylesheet" href="<?php echo get_template_directory_uri() . '/scss/base.css'; ?>" media="all">
</noscript>
Now that your Critical CSS is in place, take a look at some of the plugins you can use to improve page speed in WordPress, which will further optimize the DOM by minifying and compressing other areas of your theme code along with adding caching.
In addition to those plugins, you can also consider the Fast Velocity Minify plugin. It’s also worth noting that some of the recent speed optimization plugins can generate Critical CSS automatically, so that is another option to consider as you determine the method you’ll use to create Critical CSS in WordPress.
Conclusion
A broad awareness of the critical rendering path on your site is the first step towards good performance and Critical CSS is often the most confusing and time-consuming part of the optimization process. The techniques outlined above are a basic start to good performance and should help you improve your mobile and desktop speeds!
When properly used, Critical CSS can also improve the perception of better speed, even if your speed scores aren’t totally maxed out. You can also take a few extra steps to enhance Critical Inline CSS, like caching your Critical styles and using “CSS cleanup” tools to remove unused styles. Happy optimizing!

Hello Hiep,
Great tutorial. Could you update it with a more recent loadCSS version?
I’ve seen in the Filamentgroup Github that in 2020 that method is not really working and I’m not 100% sure how to implement the new version
Hi Louen! I just updated the article using a technique based on this article: https://gomakethings.com/how-to-load-css-asynchronously/ , which references a more recent Filament Group article: https://www.filamentgroup.com/lab/load-css-simpler/ .