


WordPress has the ability to password protect individual posts, pages and even custom post types allowing the content to be hidden from view and only display the title to the public. This quick guide to WordPress password protected pages and cookie detection will help you get started:
How to Enable Password Protection
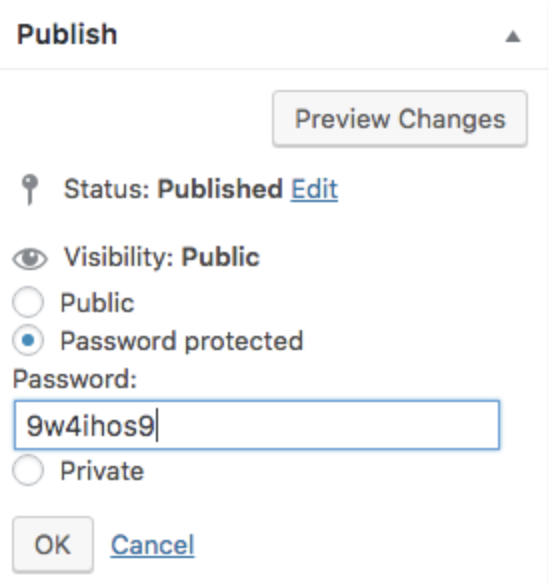
Password protection is enabled by selecting ‘Edit’ next to the Visibility option in the “Publish” settings of the WordPress admin. Select ‘Password protected’ and enter a password 20 characters or less.

How Does Password Protection Work in WordPress?
WordPress will display “Protected: ” added before the title. The excerpt and the content are hidden and replaced by a password form and a bit of text telling you the content is password protected.
WordPress stores the password as a cookie. By default, this cookie will expire 10 days after it is created. We can change this with code (as you will see below!).
If you want to password protect multiple pages or posts but not require users to log in more than once, simply assign the same password to all protected pages. WordPress can only store one password at a time. So, for example, if you were to use different passwords for two different pages, users will have to log in again to go from one password protected page to the other.

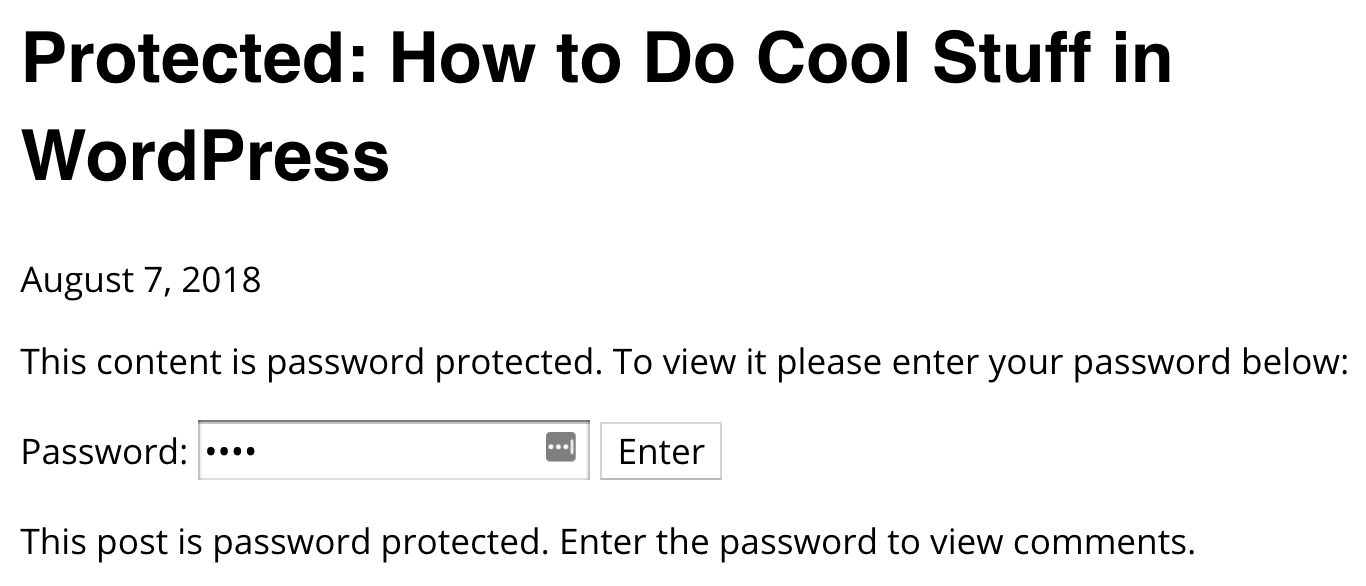
Example of a WordPress protected page. Appearance will vary based on your theme styles.
How to Password Protect Featured Images and Custom Fields
While WordPress’s password protection for posts and pages is nice, it does have certain limitations. For example, it will not protect additional content such as Featured Images and Custom Fields.
We can ‘fix’ this by using the post_password_required function in our theme template files. Simply enclose the unprotected code in a conditional like the one below, and, you’ve password protected your featured image or custom field content.
<?php
if ( ! post_password_required() ) {
  the_post_thumbnail();
}
?>
How to Check if a User has Previously Logged into a Protected Page, Even in Other Areas of Your Site
So, what if you want to check if a user has previously logged into a protected page when they navigate to a non-protected page? If we aren’t on the protected page itself, we can’t use the post_password_required function. However, we can use cookie detection. As we mentioned before, when a user logs into a protected page, WordPress sets a cookie. We can check for the existence of that cookie with this conditional:
If ( isset( $_COOKIE['wp-postpass_' . COOKIEHASH] ) ) {
  // Do stuff.
}
We simply need to check if that cookie is set. If the conditional is true, we know the user has already logged into a protected page. So, we could do something such as present a different header, footer, menu, etc. to users who have previously logged into a protected page or post on your site. This likely isn’t something you’ll need to use too often, but it’s a pretty nifty trick should you ever need it!
How to Change the Cookie Expiration Time
Having the cookie set for ten days may not work for your project. Fortunately, we can add the post_password_expires filter to functions.php to adjust the expiration time.
function mind_set_cookie_expire( $time ) {


  return time() + 86400;  // 1 day
  // Some other examples:
  // 1 Minute would be:
  // return time() + 60;
  // return 0; to set the cookie to expire at the end of the session.

}

add_filter( 'post_password_expires', 'mind_set_cookie_expire' );
As you can see, I’ve added some comments to the code as examples. By using the PHP time() function to return a UNIX timestamp, plus a number of seconds, we can change the cookie expiration time. Returning a value of 0 will allow the cookie to expire when the user closes the browser.
There’s a lot you can do with WordPress Password Protection. Check out the WordPress Codex for more information, details, and examples.